SolusVM主控lighttpd提示can’t bind to port:5353 Permission denied
#vi /etc/selinux/config
selinux=enforcing 改成 selinux=disabled
保存后退出重启lighttpd
#vi /etc/selinux/config
selinux=enforcing 改成 selinux=disabled
保存后退出重启lighttpd
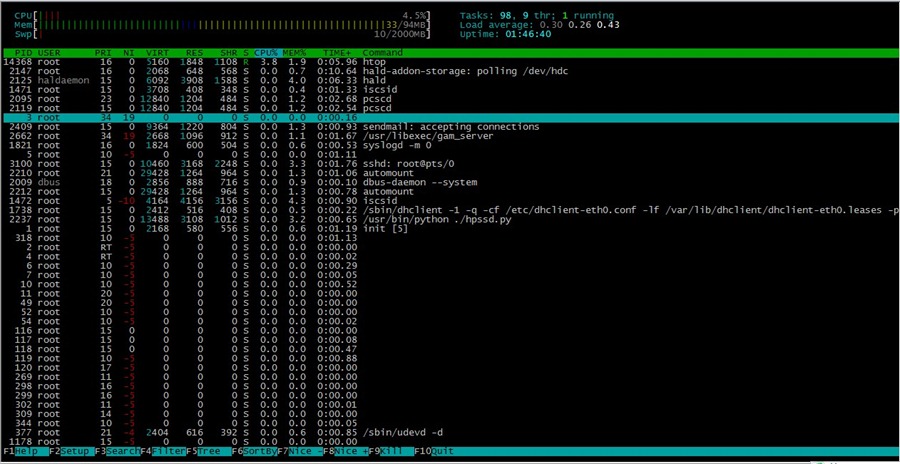
官网 http://htop.sourceforge.net/
安装:
yum install htop
# 如果以上无法安装;请登入官网下载,然后运行以下命令安装
yum install ncurses-devel
tar zxvf htop-*.tar.gz
cd htop-*
./configure
make && make install
#htop
cpulimit 命令的工作原理是为进程预设一个 cpu 占用率门限,并实时监控进程是否超出此门限,若超出则让该进程暂停运行一段时间。cpulimit 使用 SIGSTOP 和 SIGCONT 这两个信号来控制进程。它不会修改进程的 nice 值,而是通过监控进程的 cpu 占用率来做出动态调整。
cpulimit 的优势是可以控制进程的cpu使用率的上限值。但与 nice 相比也有缺点,那就是即使 cpu 是空闲的,进程也不能完全使用整个 cpu 资源。
在 CentOS 上,可以用下面的方法来安装它:
wget -O cpulimit.zip https://github.com/opsengine/cpulimit/archive/master.zip
unzip cpulimit.zip
cd cpulimit-master
make
sudo cp src/cpulimit /usr/bin
上面的命令行,会先从从 GitHub 上将源码下载到本地,然后再解压、编译、并安装到 /usr/bin 目录下。
cpulimit 的使用方式和 nice 命令类似,但是需要用户使用 -l 选项显式地定义进程的 cpu 使用率上限值。举例说明:
cpulimit -l 50 matho-primes 0 9999999999 > /dev/null &
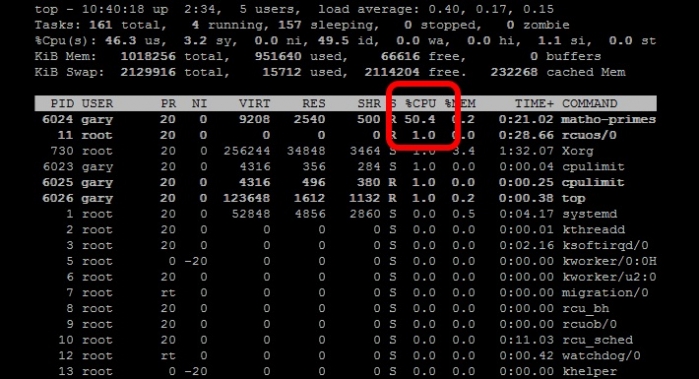
从上面的例子可以看出 matho-primes 只使用了50%的 cpu 资源,剩余的 cpu 时间都在 idle。
cpulimit 其他实例:
cpulimit -e httpd --limit 40 #限制httpd(进程名)的cpu使用率为40%
cpulimit -e /usr/local/bin/httpd --limit 40
cpulimit -p 2960 -l 55 #限制pid为2960的进程的CPU占用为55%
使用帮助:
Usage: cpulimit [OPTIONS...] TARGET
OPTIONS
-l, --limit=N percentage of cpu allowed from 0 to 3200 (required)
-v, --verbose show control statistics
-z, --lazy exit if there is no target process, or if it dies
-i, --include-children limit also the children processes
-h, --help display this help and exit
TARGET must be exactly one of these:
-p, --pid=N pid of the process (implies -z)
-e, --exe=FILE name of the executable program file or path name
COMMAND [ARGS] run this command and limit it (implies -z)
参考:https://linux.cn/article-4742-1.html
1) 文件内全部替换:
:%s#abc#123#g (如文件内有#,可用/替换,:%s/abc/123/g)
--注:把abc替换成123
(或者: %s/str1/str2/g 用str2替换文件中所有的str1)
2) 文件内局部替换:
:20,30s#abc#123(如文件内有#,可用/替换,:%s/abc/123/g)
--注:把20行到30行内abc替换成123
1) 创建一个新文件 /etc/yum.repos.d/city-fan.repo
2) 复制下面的到上面文件中:
[CityFan]
name=City Fan Repo
baseurl=http://www.city-fan.org/ftp/contrib/yum-repo/rhel6/x86_64/
enabled=1
gpgcheck=0
3) 操作:
yum clean all
yum install curl
#使用read命令读取一行数据
cat datafile.txt | while read myline
do
echo "LINE:"$myline
done
安装
wget https://raw.github.com/sivel/speedtest-cli/master/speedtest_cli.py
chmod a+rx speedtest_cli.py
sudo mv speedtest_cli.py /usr/local/bin/speedtest-cli
sudo chown root:root /usr/local/bin/speedtest-cli
使用
speedtest-cli
centos下当screen无法正常-R恢复exit退出的时候我们可以直接删除该任务
cd /var/run/screen/S-root/
ls -ls
rm -rf name.name
centos6,运行locate命令,控制台提示
locate: can not stat () `/var/lib/mlocate/mlocate.db': No such file or directory
如果出现此错误,请执行
updatedb
这个命令要花一小点时间,然后再执行locate操作就行了
原文:http://blog.csdn.net/w13770269691/article/details/6987384
Axel 是 Linux 下一个不错的HTTP/FTP高速下载工具。支持多线程下载、断点续传,且可以从多个地址或者从一个地址的多个连接来下载同一个文件。适合网速不给力时多线程下载提高下载速度。比如在国内VPS或服务器上下载lnmp一键安装包用Axel就比wget快。
CentOS安装Axel:
目前yum源上没有Axel,我们可以到http://pkgs.repoforge.org/axel/下载rpm包安装。
32位CentOS执行下面命令:
wget -c http://pkgs.repoforge.org/axel/axel-2.4-1.el5.rf.i386.rpm
rpm -ivh axel-2.4-1.el5.rf.i386.rpm
64位CentOS执行下面命令:
wget -c http://pkgs.repoforge.org/axel/axel-2.4-1.el5.rf.x86_64.rpm
rpm -ivh axel-2.4-1.el5.rf.x86_64.rpm
Debian/Ubuntu安装Axel:
apt-get install axel
Axel命令使用方法:
axel 参数 文件下载地址
可选参数:
-n 指定线程数
-o 指定另存为目录
-s 指定每秒的最大比特数
-q 静默模式
如从Diahosting下载lnmp安装包指定10个线程,存到/tmp/:axel -n 10 -o /tmp/ http://soft.vpser.net/lnmp/lnmp0.7-full.tar.gz
如果下载过程中下载中断可以再执行下载命令即可恢复上次的下载进度。
原文:http://www.vpser.net/manage/axel.html