2015年8月

If you host a large database that can't be split up, and your server doesnt have the resources to handle it, you can setup mysql to be run on an external server. This shouldn't be needed too often, as usually, you can just move entire user accounts to another server to ease the load. But in the case of one large database using up the whole server, then you dont' have much choice.

Note that this guide does not transfer any databases over. It's generally a good idea to do this before you add users. Also, mysql will continue to run on your local DA.. so existing databases and scripts should continue to function, but users will not be able to control them through DA.

1)The first step is to install mysql onto the remote server. DA is not require on this server, as it is just used for mysql and nothing else. I won't go into the detail on how to do this (use google).

2) The next step is to setup a user that DA can connect to on the remote mysql server. The default DA uses is da_admin, so staying with that name is a good idea, but not required.
You can use this guide to setup the da_admin user on your server: help.directadmin.com/item.php?id=45. The username and password you setup have to be set in the /usr/local/directadmin/conf/mysql.conf file for DA to use.
On a related note, if the remote server is on a LAN IP, and the connecting IP to that remote server will not be your server IP, but rather some other IP such as a 192.168.x.x type of IP then you can use this guide to add an access host by default instead of the server IP: directadmin.com/features.php?id=818.

Note that the above guide will only grants da_admin on the "localhost", meaning you have to already be on that remote mysql server to use the account. We'll need to add another acccess hsot (ip) to allow the DA server to connect to it. Basically, you just run the "GRANT ALL PRIVILEGES ON *.* TO da_admin@localhost" command again, but you change localhost to the IP of your DA server,

GRANT ALL PRIVILEGES ON *.* TO da_admin@1.2.3.4 WITH GRANT OPTION;
FLUSH PRIVILEGES;

we don't need the "identified by 'pass'" again, because the password is already from adding it the first time.

3) At this point.. the remote mysql database should be setup and ready to accept DA to use it. Test it out by logging into your DA machine via ssh, and type:

mysql -uda_admin -p --host=4.3.2.1

where 4.3.2.1 is the IP of your mysql server. If you can't connect, go back over your settings again.. also make sure that port 3306 is open on the remote box.

4)Now.. the easier part is to tell DA to use the remote server. Edit:
/usr/local/directadmin/conf/mysql.conf
add the line:
host=4.3.2.1
where 4.3.2.1 is the IP of your remote server. Make sure there is a newline character at the end of the line.. (Eg, press enter)

5) That should be it. Go into DA and check the mysql section of your user level to see if you get any errors. If not, try adding a database to make sure it works.

6) The only cleanup task would then be to fix up phpMyAdminto also connect to the remote host.
Edit /var/www/html/phpMyAdmin/config.inc.php
Find this line:

$cfg['Servers'][$i]['host']          = 'localhost'; // MySQL hostname or IP address

and change it to

$cfg['Servers'][$i]['host']          = '4.3.2.1'; // MySQL hostname or IP address

官方文档:http://help.directadmin.com/item.php?id=140
scp是有Security的文件copy,基于ssh登录。操作起来比较方便,适合大文件的传输等。

比如要把当前服务器的一个文件copy到远程另外一台主机上,可以如下命令。
注意:-rp 可循环拷贝目录,参数-p 1111为端口,默认ssh 22端口可不加该参数

scp /home/daisy/full.tar.gz root@111.111.111.111:/home/root/

把远程服务器的文件copy到当前服务器

scp root@111.111.111.111:/home/daisy/full.tar.gz /home/root/

root@111.111.111.111:/home/daisy/full.tar.gz 为远程服务器的信息与文件位置
/home/root/ 为当前服务器保存目录

部分参考:http://blog.csdn.net/cncdns/article/details/8809784

环境:centos6.6,带有CSF的服务器;该安装方法也适用于XEN、KVM虚拟化结构VPS

首先编辑 /etc/csf/csf.conf ,打开1723、1356端口;

vi /etc/csf/csfpre.sh

iptables -t nat -A POSTROUTING -o eth1 -j MASQUERADE
iptables -A INPUT -p gre -j ACCEPT
iptables -A OUTPUT -p gre -j ACCEPT
iptables -A FORWARD -i ppp+ -o eth1 -p ALL -j ACCEPT
iptables -A FORWARD -i eth1 -o ppp+ -p ALL -j ACCEPT
iptables -t nat -A POSTROUTING -s 172.16.22.0/24 -j SNAT --to-source `ifconfig  | grep 'inet addr:'| grep -v '127.0.0.1' | cut -d: -f2 | awk 'NR==1 { print $1}'`
iptables -A FORWARD -p tcp --syn -s 172.16.22.0/24 -j TCPMSS --set-mss 1356

创建 csfore.sh 设置防火墙开启转发等;注意代码中 eth1 为公网IP网卡

创建安装PPTP一键脚本
vi /root/pptpd6.sh

yum remove pptpd ppp -y
iptables --flush POSTROUTING --table nat
iptables --flush FORWARD
rm -f /etc/pptpd.conf
rm -f /etc/ppp
arch=`uname -m`
yum -y install make libpcap iptables gcc-c++ logrotate tar cpio perl pam tcp_wrappers dkms kernel_ppp_mppe ppp
wget https://www.cnweed.com/usr/uploads/2015/08/pptpd-1.4.0-1.el6.$arch.rpm
rpm -Uvh pptpd-1.4.0-1.el6.$arch.rpm

mknod /dev/ppp c 108 0
echo 1 > /proc/sys/net/ipv4/ip_forward
echo "mknod /dev/ppp c 108 0" >> /etc/rc.local
echo "echo 1 > /proc/sys/net/ipv4/ip_forward" >> /etc/rc.local
echo "localip 172.16.22.254" >> /etc/pptpd.conf
echo "remoteip 172.16.22.1-253" >> /etc/pptpd.conf
echo "ms-dns 8.8.8.8" >> /etc/ppp/options.pptpd
echo "ms-dns 8.8.4.4" >> /etc/ppp/options.pptpd

pass=`openssl rand 6 -base64`
if [ "$1" != "" ]
  then pass=$1
fi

echo "vpn pptpd ${pass} *" >> /etc/ppp/chap-secrets

#iptables -t nat -A POSTROUTING -s 172.16.22.0/24 -j SNAT --to-source `ifconfig  | grep 'inet addr:'| grep -v '127.0.0.1' | cut -d: -f2 | awk 'NR==1 { print $1}'`
#iptables -A FORWARD -p tcp --syn -s 172.16.22.0/24 -j TCPMSS --set-mss 1356
#service iptables save
#chkconfig iptables on
chkconfig pptpd on
#service iptables restart
service pptpd start

echo ""
echo "VPN service installed successfully, your VPN username is vpn, VPN password is ${pass}"
echo "Please visit: http://www.cnweed.com"
echo ""

保存。然后 csf -r 重启CSF防火墙,以及sh /root/pptpd6.sh 安装脚本

chmod 755 /root/pptpd6.sh
csf -r
sh /root/pptpd6.sh

注:如果ip_forward没有打开,可以直接修改/etc/sysctl.conf

net.ipv4.ip_forward=1

修改之后运行 sysctrl -p 使其生效

打开控制面板-管理工具,终端服务-终端服务配置

1、连接:RDP-tcp 点右键,属性。网络适配器-最大连接数,只允许1个。

2、终端服务器授权模式:点右键,属性。常规,限制每个用户只能使用一个会话,掉勾,确定。

3、防止恶搞,阻止远程用户终止控制台管理员

运行-gpedit.msc ,计算机配置-管理模板-Windows组件-终端服务。
终端服务器-连接。

配置:拒绝将已经登录到控制台会话的管理员注销,设置启用。

重启生效

参考:http://dengcunhong.blog.163.com/blog/static/28812917201242611115897/

.mxZoZ4onWr

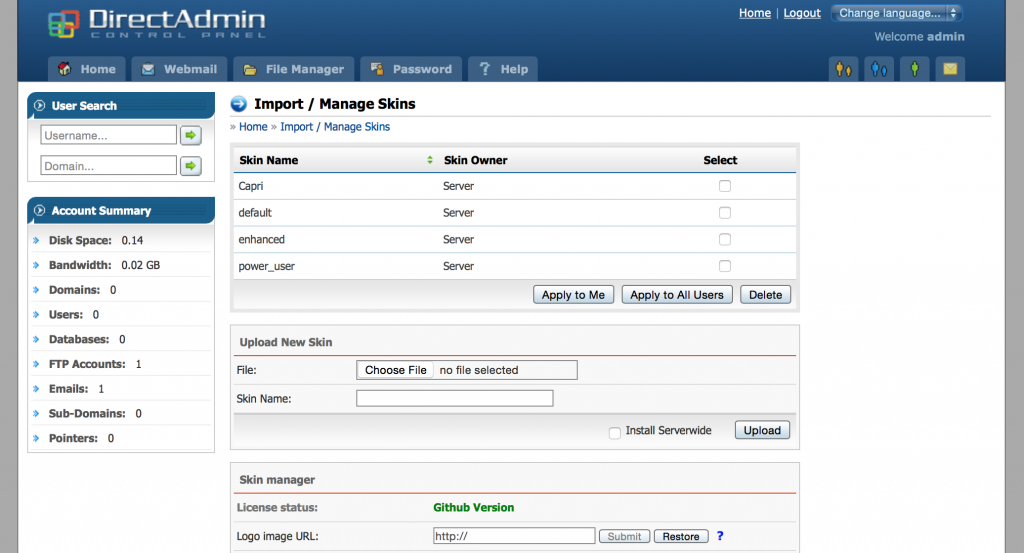
Capri是一套商務的DirectAdmin主題,用的人應該不少,我個人也相當喜歡。
前段時間,作者已經將這套主題放到github開源了,並且去掉了function.php的license認證機制。
所以現在算是免費提供使用了,就如上圖所示,當然顯示的license就是github version的。
github地址:https://github.com/Terrorhawk/Capri

wget -O capri.sh http://localserver.flaxe.eu/Capri-install/capri.sh
chmod +x capri.sh
./capri.sh

相關詳情請查看:
https://forum.directadmin.com/showthread.php?t=51079

转载:http://www.guyusoftware.com/2015-05-16-5921.html

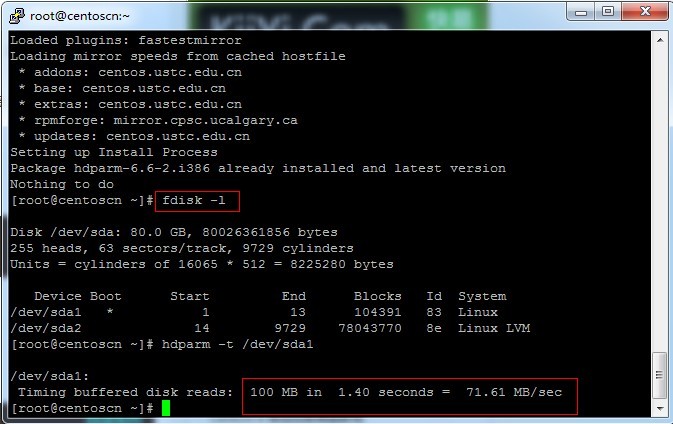
一、安装hdparm

yum install hdparm -y

二、评估读取
SSD 硬盘,请使用hdparm命令进行读取测试。

hdparm -t /dev/sda1 L

SSH执行以上命令,可使用hdparm评估SSD的读取速率。
注意,“/dev/sda1”指的是对应磁盘的驱动号,请执行“fdisk -l”查看。

032A03351-0

转载自:http://linux.it.net.cn/CentOS/server/2014/0226/332.html